.JPG)

Showing posts with label Blanket. Show all posts
Showing posts with label Blanket. Show all posts
Monday, September 10, 2012
Color
I have forgotten to take pictures of WAY too many projects this past year. But, here is a blanket I did a month ago that is one of my current favorites :)
.JPG)

Friday, February 24, 2012
Connor's Blanket
We have SO many pregnant friends right now...I have a complete inventory of material ready for baby blankets, my go to baby gift :) I love flannel on one side and minky on the other, it's been a favorite of ours here so that is what I make our friends!
.JPG)
A dump truck for a Construction company owning daddy!

So soft and cozy, makes me want to snuggle in :)
.JPG)
A dump truck for a Construction company owning daddy!

So soft and cozy, makes me want to snuggle in :)
Monday, November 7, 2011
Silky Cuddle Blanket
I love the minky and flannel together, so warm, soft, and cuddly. Perfect combination to snuggle with from newborn to toddler!

The Silky Cuddle Blanket
Supplies:
1 yard minky
1 yard flannel
1 package of silk binding
Finished size: (approximate) 38"x46"
- Cut minky to 36"x44", square off the flannel, 1 yard should be approximately 36"x44"
- Manually wrap the silk around the edges, this will give you the length needed. At each corner fold the edge up 2" so there is a total of a 4" loop at each corner. Add a seam allowance and cut so it matches the length you just measured.
- sew the ends of the silk together.

- Sandwich the satin between the flannel and minky, right sides together all raw edges matching up.

- to create the corner fold up the satin 2" at the corner, angle it and fold the other direction. You will have excess satin hanging out
- Sort of ruffle the satin along the corner and pin the "sandwich" in place. Be careful that all folded edges of the corner are tucked neatly in and will NOT get caught in your sewing, however you do want to make sure that ALL of the raw edges get caught
- Pin well!

- Sew all along the edge leaving a 3-4" opening to flip the blanket right side out. Then stitch a narrow seam along the flannel/minky edge all the way around
- All raw edges on the satin will be hidden, and you will only see the one seam where you sewed the edges together!

I have an embroidery machine, so I love to personalize the gift. You could also hand applique or hand embroider and design on

My 3, almost 4 year old fights my 8 month old for the blanket we have like this! Perfect for all little ages :)
Monday, May 23, 2011
Yummy Blanket Cupcakes
It's the first day of summer for my kiddo's, and I'm SO not ready! They were only in preschool, but still, I liked my few hours to get some things done, and to cuddle with the Baby. :) Today my Dolly is begging to go outside, but it is not nice out, and so it all begins!
Now, on to the Yummy Blanket Cupcakes!

These are so fun, and so cute!
Start with a receiving blanket for each cupcake.

I made mine, also simple! I took a yard of flannel, squared it up, and then used an overedge on the edges!

I didn't take many pictures, but you get the idea :)

I used about 8-10 coffee filters for each cupcake.
I cut the bottom out of 4-5 and slid those of the cupcake, then slid the other 4-5 on the bottom.
Use a rubberband to hold in place
Cut some cute ribbon to cover the rubber band, hot gluing in place!

To top them:
1. I just rolled the blanket a little crooked so it would swoop up
2. I added a pacifier clip that I made
3. I added a flower headband that I made!

I bought a cake box from the store to place them
Tie closed with a ribbon and give as an adorable baby shower gift!
** Check out the fabulous blogs I'm linking up with, I've listed them here: http://itssewforyou.blogspot.com/p/linky-partys.html
Including: http://todayscreativeblog.net/
** Check out my Linky Party on Tuesday!
http://itssewforyou.blogspot.com/2011/02/its-sew-fun-tuesday.html
Now, on to the Yummy Blanket Cupcakes!

These are so fun, and so cute!
Start with a receiving blanket for each cupcake.

I made mine, also simple! I took a yard of flannel, squared it up, and then used an overedge on the edges!

I didn't take many pictures, but you get the idea :)

I used about 8-10 coffee filters for each cupcake.
I cut the bottom out of 4-5 and slid those of the cupcake, then slid the other 4-5 on the bottom.
Use a rubberband to hold in place
Cut some cute ribbon to cover the rubber band, hot gluing in place!

To top them:
1. I just rolled the blanket a little crooked so it would swoop up
2. I added a pacifier clip that I made
3. I added a flower headband that I made!

I bought a cake box from the store to place them
Tie closed with a ribbon and give as an adorable baby shower gift!
** Check out the fabulous blogs I'm linking up with, I've listed them here: http://itssewforyou.blogspot.com/p/linky-partys.html
Including: http://todayscreativeblog.net/
** Check out my Linky Party on Tuesday!
http://itssewforyou.blogspot.com/2011/02/its-sew-fun-tuesday.html
Wednesday, March 23, 2011
New Listings
My Ivory Rose headband was featured on a treasury!
Now, introducing the Kameron jungle Blanket...so soft and Cuddly - LOVE it!
 Love the cute jungle print and the mix of colors :)
Now, introducing the Kameron jungle Blanket...so soft and Cuddly - LOVE it!

Friday, February 18, 2011
Diamond Argyle Quilt
Once Upon a Time I was searching for a quilt pattern for my 3 year olds room.

I came acoss this pattern, and loved it
 the size wasn't right, so I stated by cutting apart the pattern and remaking it to fit a queen size bed. I had never sewn diamonds, but thought it's still a straight line, right? HA!
 First up, shopping, samples to see what went with the fabrics I'd already purchased!
 A big pile of bright colors...
 ...led to a LOT of diamonds to be cut!
 Then it was time to lay it out to determine what order would be best.
 I struggled to meet the angles up appropriately! I'll take pointers if anyone has them :)
I tried using an iron on batting, and although it was easier than not using anything to fuse together, I wasn't entirely impressed. I still ended up with lumps and uneven spots. I had laid it on the ground and ironed right on my carpet as it was too heavy on the ironing board, but it still didn't get smooth.
 I quilted by "stitching in the ditch" but I don't have a walking foot, so they jumped all over the place!
 The colors are bright, the sewing is imperfect...but I love how it turned out
 The back is made of large rectangles. I had originally bought the back fabrics for the front, but the big designs didn't work for the pattern, so it became the back! But now it's reversible to another great yet simple
design :)

** Check out the fabulous blogs I'm linking up with, I've listed them here: http://itssewforyou.blogspot.com/p/linky-partys.html
** Check out my Linky Party on Tuesday!
http://itssewforyou.blogspot.com/2011/02/its-sew-fun-tuesday.html

I came acoss this pattern, and loved it


I tried using an iron on batting, and although it was easier than not using anything to fuse together, I wasn't entirely impressed. I still ended up with lumps and uneven spots. I had laid it on the ground and ironed right on my carpet as it was too heavy on the ironing board, but it still didn't get smooth.


design :)

** Check out my Linky Party on Tuesday!
http://itssewforyou.blogspot.com/2011/02/its-sew-fun-tuesday.html
Monday, January 24, 2011
Handmade Chenille Baby Quilt


many, many lines

~~Check out my Linky Party page to see who I'm linking to this week~~
Tuesday, January 18, 2011
Blanket
i had a customer on etsy contact me for this custom blanket

I love it!

Both sides are made of plush minky fabric


Tuesday, January 11, 2011
Super Soft Cuddle Blanket
Just added to my store:

Only 1 left

And it can personalized with your little one's name!


Only 1 left

And it can personalized with your little one's name!

Saturday, December 18, 2010
Robots - oh my!
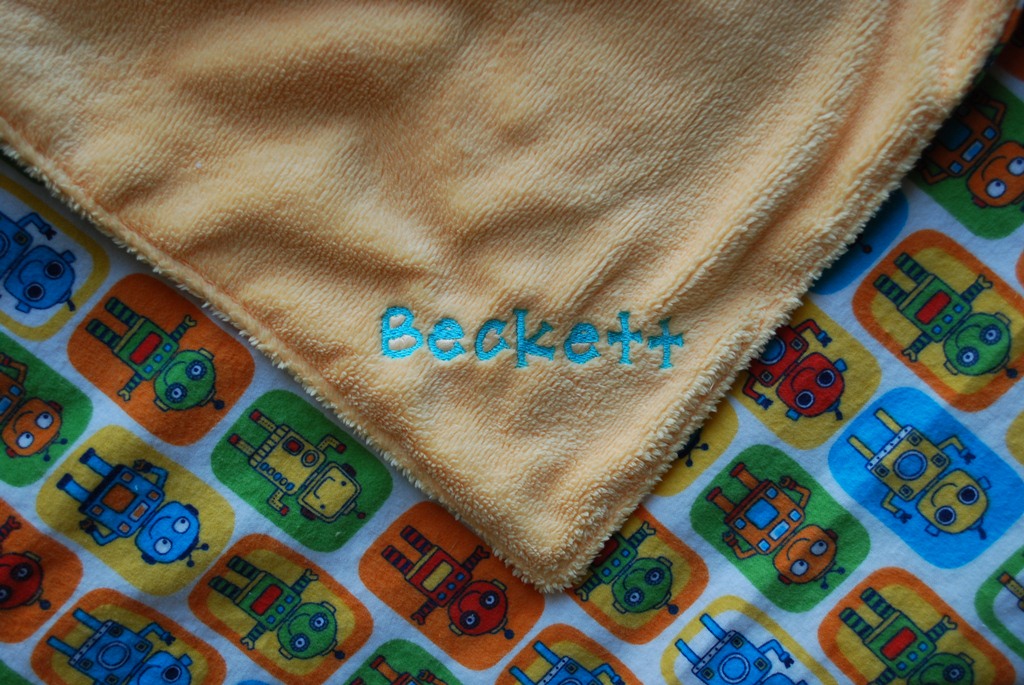
For a recent baby gift I found this adorable robot flannel that I just had to use! I happened to have a robot applique that complimented the fabric perfectly, I was so excited!

i started by making a personalized bib

Then added the coordinating fabric to the back

I also made this super cuddly blanket.


Subscribe to:
Posts (Atom)