Monday, February 14, 2011

Valentine's Vacuum

Happy Valentine's to Everyone!!

This year for for Valentine's, I got something that really "sucks" HAHA! My humor is awful!


Actually, this thing is awesome! the base swivels, and is so easy to use!! And my kids are loving it, how do I keep that excitement going?


**sorry for the awful photos, night pictures!

Friday, February 11, 2011

Custom Bed

My husband and I tend to get bored when we run out of projects...might be why we are in our third house in 7 years of marriage! We can also be cheap and not want to spend too much. You put these two things together, and you end up building a custom bed for your three year old! This isn't the first bed we made (some other time I'll have to post my Buddy's bed), but this is the one we made most recently!

We put my Dolly in a queen size bed when we moved into the house when she was just over 2. It was nice we didn't have to worry about her rolling out! When we found out #3 was on the way, we hurried to finish the basement so we would have bedrooms down there for kids #1 and #2 (and my sewing room!!) Well, When #3 was born this fall, we didn't feel #2 was ready to move downstairs, so we decided the girls were to share a room. The room is decent size, but not big enough for a queen bed and a crib...and dresser...and changing table...and toys! Thus created the NEED for this new bed :)


The bed was inexpensive, fabric and materials (including headboard) cost us less than $50. And it was timely, less than a couple hours to assemble.

As usual, it all began with surfing the internet. Design Mom made this fabulous toddler bed. We didn't want a toddler bed, so we just took the idea and started creating our own. First we went shopping for a mattress (not included in $50 price tag! Did you know that twin mattresses tend to be almost as expensive as a queen? we were shocked!) Once you have your mattress, it really is all about measuring.

Measure the mattress, add a few inches to the length and width and that is the interior size of the box to drop your mattress in! I didn't want ours too tight so that it was easy to get the fitted sheet around the mattress, so we added about 3 inches to the length and width.


The sides of our bed are 11" high (because that was the scrap board we picked up!) and then there is a 2" lip to hold the mattress in, so the mattress is 9" off the floor. Perfect for a young one.

Next pull out the batting, I purchased cheap batting and laid mine on two layers thick.


I had lots of help!

Next is the fabric. I measured the length + width and bought that much fabric. With how narrow of a strip of fabric you need I decided to sew a seam at one corner. If you don't want to do any sewing, you could staple a seam. A third option is to purchase additional fabric so a continuous loop can go all the way around.

With this you will end up with lots of scrap fabric. Even cutting the fabric in half, out of the 44" I used 32", leaving a 12" strip 2.5 yards long!


Make sure to fold the batting and the fabric over the edges of the bed. Use a staple gun to secure in place every few inches.

Although I like the simple look of Design Mom's toddler bed, I felt our room needed some height, and so we decided to create a headboard too. Once again, we had purchased scrap wood, so used that to determine the height (42") and the width is 2" shorter than the width of the bed so that it stays nicely tucked behind the bed.

Upholster with two layers of batting and the fabric and you are done! You could nail/screw the headboard to the bed, but once ours was pushed against the wall it was so snug we just left it, and it hasn't moved at all since installation!


And now we have one bright bed for one bright room :)


** Check out the fabulous blogs I'm linking up with, I've listed them here: http://itssewforyou.blogspot.com/p/linky-partys.html

Photobucket

Thursday, February 10, 2011

Projects I love - Valentine's!

Organize and Decorate Everything has some adorable Decorating ideas for your home, this one was my favorite!

Lyndsey's Craft Spot made this fun countdown to Valentine's day, what a fun way to get the kids excited!

She wears Flowers posted a tutorial from In Between Laundry that I find genius. Why have I not thought of this before? using puff paint to turn any sock into a non-slip sock!


Once again I'm loving the Subway Art, especially this one from Morgan Made It


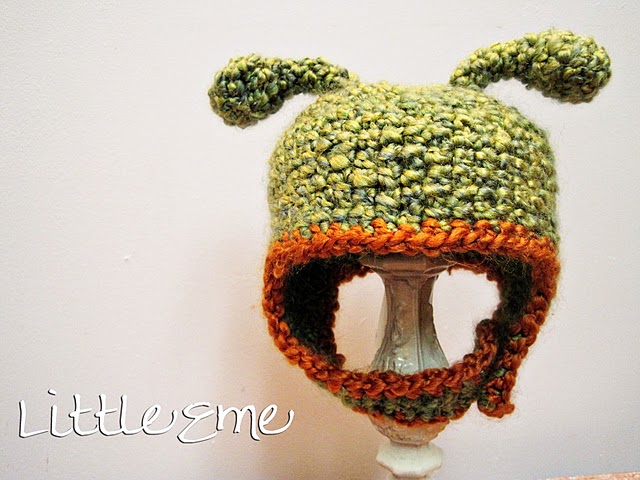
OK, this one isn't Valentine's, but how cute is this Shrek Hat from Little Eme?

There are way too  many cute things out there right now, and not enough time in the day!!


If you've been featured, please grab a button!


BLOG TITLE


Tuesday, February 8, 2011

Cream Cheese Cookie Bars

Yum, Yum

I found this recipe at Amanda's Cookin' and it is fabulous!

Cream Cheese Cookie Bars

Ingredients:
1 1/2 cups sugar
1 cup butter, softened
8 oz cream cheese, softened
1 egg
1/2 t almond extract
1 teaspoon vanilla
1/2 teaspoon baking soda
1 teaspoon baking powder
2 1/2 cups all purpose flour

Frosting:
1/2 cup butter softened
4 oz cream cheese, softened
3 1/2 - 4 1/2 cups powdered sugar
3-5 tablespoons milk
1 teaspoon vanilla
food coloring or icing paste

Beat the butter, cream cheese, sugar, and egg until nice and frothy, about 4 minutes. Add the vanilla and almond extract and beat for 1 minute more.

In a small bowl combine the flour, baking powder and baking soda. Add the flour mixture to the butter mixture and beat for 2 minutes. Press the dough into a large jelly roll (cookie sheet) pan. (Mine was 10.5x15.5) Bake at 350 degrees for 20 minutes. Let the pan cool completely.

To make the frosting, in a medium sized bowl (or your stand mixer) combine the butter and cream cheese. Beat for 2 minutes. Add the powdered sugar, milk, vanilla and food coloring. Mix for 1-2 minutes or until smooth. Frost your pan of cookies.

Cut the cookies into bars and serve.


Don't forget to lick the frosting bowl clean.


Add sprinkles if desired, like we did for this Valentine's treat.

Enjoy!

** You may want to ignore this part of the post. I did a little math (thank you to www.myfitnesspal.com) and calculated that if you cut the pan into 54 bars like I did, there are 136 calories per serving. Sadly, it is easy to eat 2 or even 3 bars without blinking, oops!

Freezing
I did freeze half my bars (so I'd stop eating them!!) and when I took them out a week later they were still fabulous as if they were freshly baked that day!

Monday, February 7, 2011

Where have I been?

Yikes, I feel like I took last week off from projects and checking out what I want to make next. I was fighting a cold and my few free moments ended up being spent trying to rest, or rocking my baby who was also fighting a cold! I'm still fighting this thing, going on week 3, but gotta get stuff done around the house!

We had a busy weekend...my Buddy had a hockey game, Grandpa and Grandma left really early in the morning and drove on horrible winter roads to come watch him. Then the boys went ice fishing, Grandma took my Baby and I took my Dolly to the movie Tangled. First time we've done that, so she was pretty excited :) Later that night we went to a hockey game where the kiddo's got to ride the zamboni!


After the game the grandparents, my hubby's sister and her husband, and three of their cousins came over to our house...while it was fun, it made for a late night for a girl who wasn't feeling well and needed her bed! yesterday I did get to sleep in after feeding the Baby, we went for lunch, then I started cleaning and getting ready for tonight...Girl's Bunco night here! It's fun cleaning with three little ones underfoot ;)